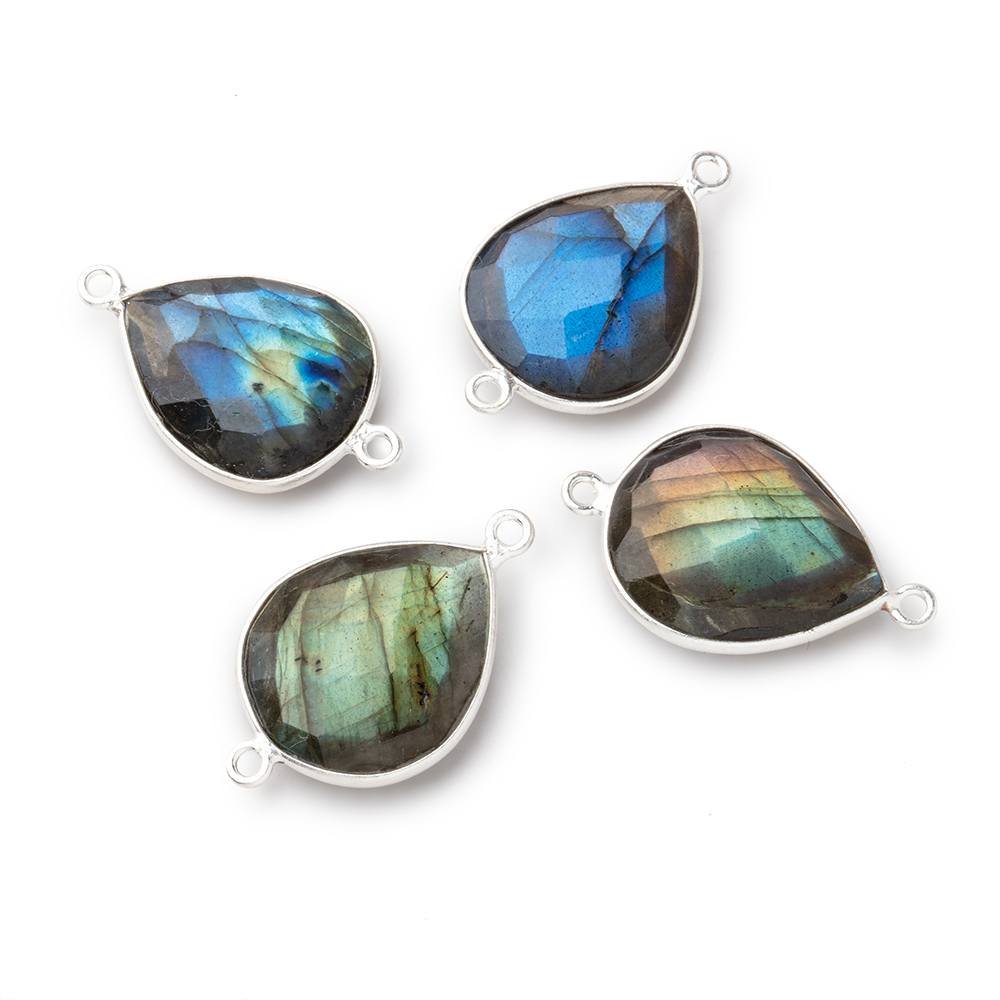
If you’ve been jewelry making for quite some time now, you may have come across the term “bezel setting.” Bezel setting is a way to mount gemstones onto jewelry, particularly rings. A bezel setting involves a strip of jewelry to encircle the entire gemstone. This is different from a prong setting, which use small pins to hold and mount the stone.
Bezel settings are very good at securing gemstones in place. They are preferred for those who work with their hands a lot or who may bump or hit their ring a lot. Bezel settings keep the gem from coming loose because it is encased in the metal band. This type of setting can also hide flaws in the gem.
While prong settings are cheaper than bezel settings, they become easily damaged and can cause the gemstone to fall out. The gem can then become lost. Once you set up a bezel, though, it can be difficult to replace your gem.
A bezel setting requires a different set of jewelry making skills than you may be used to, but if you have some basic metalsmithing skills and the right equipment, you can create a ring in a beautiful bezel setting. Probably one of the most important steps is choosing the right wire. Fine silver bezel wire is the wire of choice because it’s easier to bend around a stone.
In addition, the wire should be annealed, which means heated and then slowly cooled. This makes the wire tougher. Springy wire is difficult to use, so opt for annealed wire and keep it wound in a coil to make it easier to use.
You can also make your own bezel wire from metal sheet. Just cut it to the size you need using guillotine shears. If using gold bezels, opt for 18 or 22 karat gold wire. That’s because 14 karat gold is springy and hard to work with. The larger karats are more expensive, but they will save you time in the long run.
Bezel setting can be a time-consuming skill to master, but, in the end, you’ll have a gorgeous piece of jewelry that you created yourself. What could be more rewarding? Here’s a bezel setting tutorial – complete with detailed steps and photos – to help you get started.
Materials: If your niche is bead making, you’ll need a different set of tools for this project. You’ll need materials such as a jeweler’s file, soldering equipment, jeweler’s saw, sandpaper grits, fine silver bezel wire, sterling silver sheet and stock, a bezel pusher, burnisher, and ring mandrel. Your local craft store should have some of these materials. If not, you may have to venture online to get everything you need. Don’t skimp on the materials – they’ll save you time and make the process less frustrating.
Steps: There 19 steps to completing this bezel setting. The first step is to find an object to bezel. You can use a loose gem, round piece of glass or button – anything with a flat bottom and smooth surface. Next, shape the wire around the stone so you know how much to use. The bezel should be just a little larger than the stone.
Trim, file the ends, and match the ends. Next, you will do some soldering and shaping. Smooth the edges, adjust the height and create the backing. Use a tripod and screen to solder the bezel. Solder and trim the bezel. File and sand the bezel cup and place the stone into the bezel. The final steps are to push the bezel, burnish, and add the finishing touches.
Many jewelry makers use a patina solution to darken the metal. Use patina with caution, however, since some gems – such as pearls, lapis, turquoise, and moonstone – are very fragile.
If you have some loose gems and want to take your jewelry making skills to a whole new level, bezel setting is a valuable skill to learn. If you have your own jewelry business or plan to eventually, it’s always good to have new skills. Knowing how to set stones can open up a door to numerous jewelry-making opportunities. Plus, you’ll learn how to make creations you never knew were possible.